Showing posts with label Christmas ornaments. Show all posts

Thursday, December 14, 2017

Oh, Christmas Tree


I finally got my Christmas tree up and decorated.

I couldn't decide whether to put vintage ornaments or homemade ornaments on it. I love both!

So, I decorated with both.


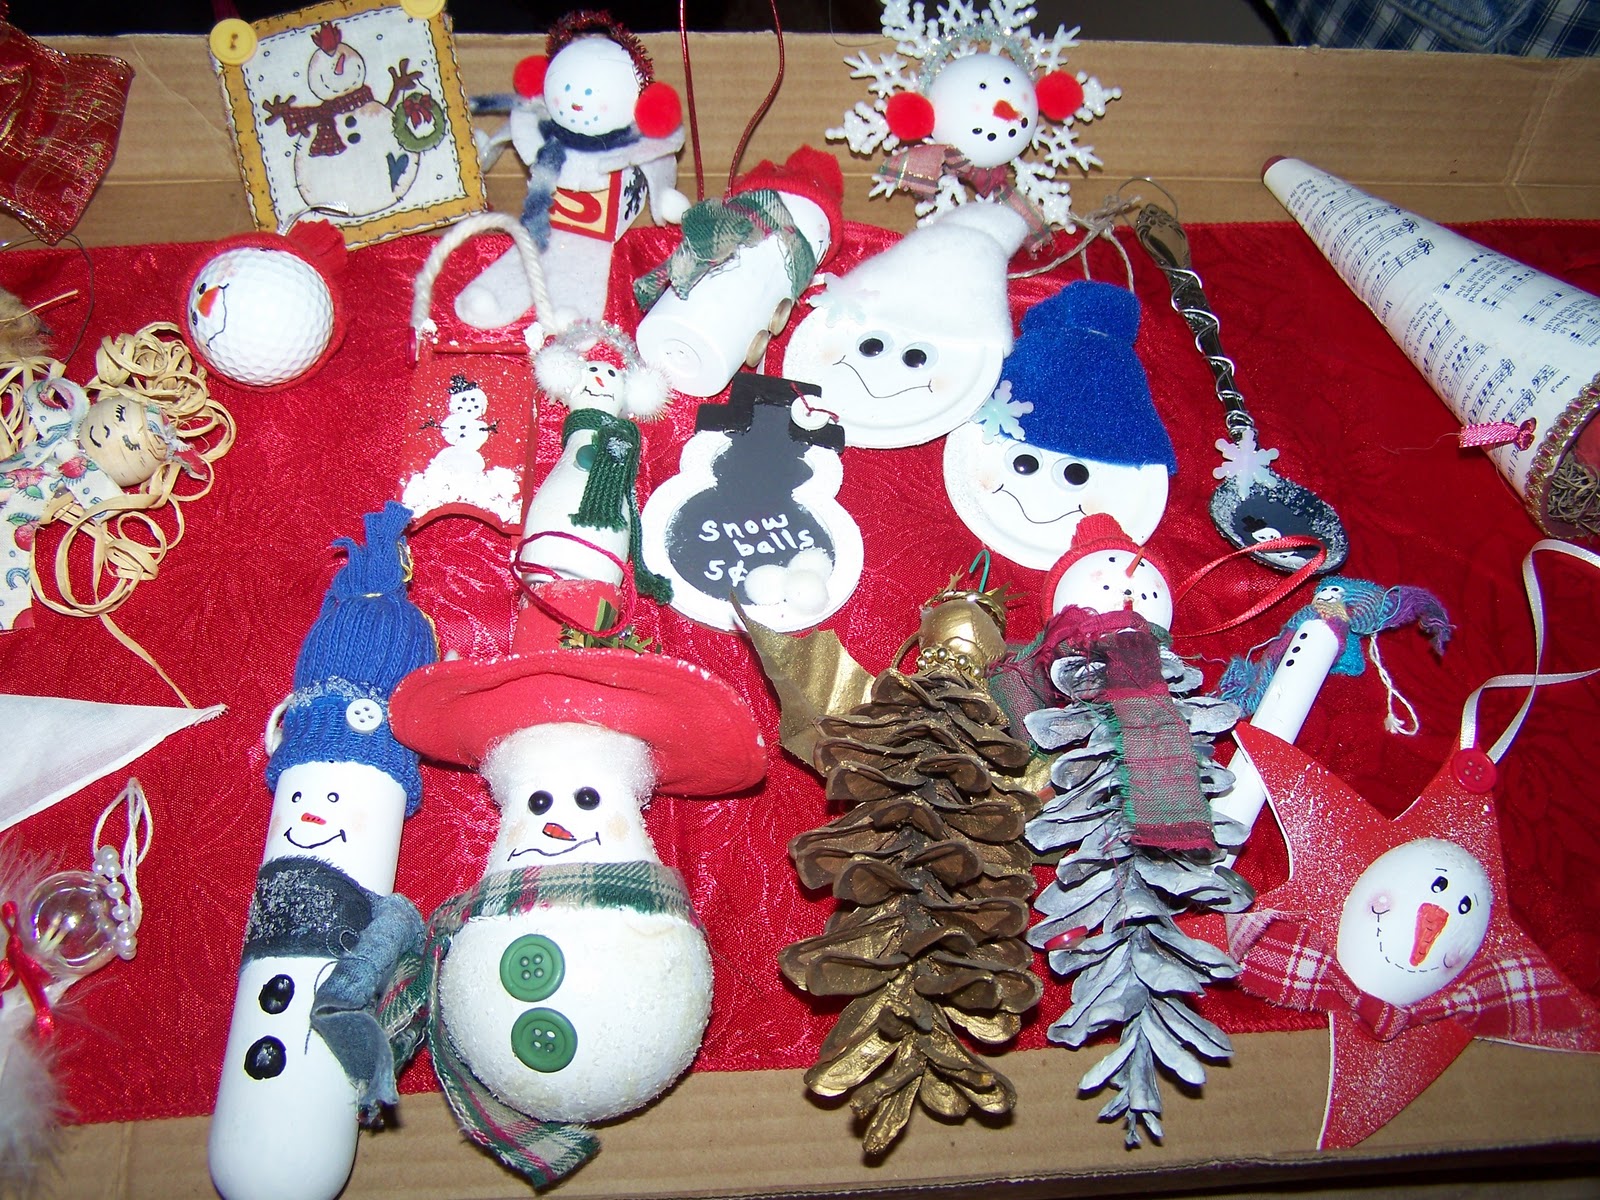
vintage  ornaments + snowmen from jar lids and old wooden spools and vintage quilts


more from old quilts, scrabble ornaments


angel from page from song book and I love the vintage one where the heat from a light makes the inside wings go around and around


gingerbread baker from small lightbulb, handmade sheep and santa.


wreath made from vintage ornaments


Below are some links to posts from previous years on making Christmas ornaments and crafts. Check them out. There is still time to make some Christmas magic.

 Click here, here, here, here, here, and here


 Have you put up your tree yet?

Do you like homemade ornaments or new shiny ones?


Monday, December 20, 2010

Christmas Recipes and Crafts


It has been a busy month. We have celebrated two birthdays in our family. My sons Andrew and David were born on Dec 11th and Dec 13th (different years, of course). We usually celebrate on the 12th with one cake shared by both boys.

I brought our duck in out of the cold and dressed her for the holidays.


We have had a lot of snow and we have been feeding the birds.


I am almost ready for Christmas. How about you.

I have posted recipes before that are very good to make around the holidays.

Hard rock candy. I make this every year and it is very easy to do and makes great gifts, too. I make mine in the microwave. Go here to see my recipe.

Pecan Pie Muffins and Nuts and Bolts. The muffins are delicious and the Nuts and Bolts are a great snack.

Fudge. Everyone loves fudge. I like the old fashioned hard kind. The kind we grew up with. Go here to see this easy and delicious recipe. If you have harvested any black walnuts or hickory nuts this year, they are very good to add to fudge.

Party Cheese Ball. My family loves cheese balls, especially my husband. I used to make these only on the holidays, but now I make them all the time.

Pumpkin Muffins.

I have also posted a lot of Christmas crafts.

Click on the ones below that you are interested in and take a look. My scrabble ornaments are very popular, I used to make them and sell them at craft shows, I would personalize them with their name or whatever else they would want on them. They are good to put on the outside of presents as name tags. The gumdrops are also very pretty! I love them and they are very easy to make.

First Christmas Ornament, Natural Christmas Ornaments, Birdhouse ornaments,
Christmas Ornaments, Cinnamon Dough Ornaments,Gumdrop Ornaments, Scrabble Ornaments

 Have a very Merry Christmas and I hope you give some of my crafts and recipes a try.

Tuesday, December 7, 2010

Getting Out The Decorations

I have slowly been decorating my house for the Christmas season. I got down my box of tree ornaments from the closet shelf this morning.


I found out that I like angels. . .


snowmen. . . 

and birds.


Did I mention that I liked snowmen?


I think  I  like snowmen. . .


The little vintage houses were sold with a string of lights. There is a hole in the back of them where the light was inserted and they were strung on a tree. I found these in a ziploc bag at a yard sale. I know they were a light set, because a few years back I found another set of these at a thrift store in the box they were sold in. Its like a little lighted Christmas village. I think  they are very neat.

Can you tell that I recycled a lot of items in making the ornaments and decorations? Some of the things I used were old vinyl records, cds, plastic film boxes, pencils, Styrofoam cups, old quilts,  pine cones, juice lids, different sizes of light bulbs, spoons, blocks, golf balls, pages from a songbook and clothes pins.

I love re using items.

Saturday, December 12, 2009

Making 'Natural' Ornaments

Thistles, Pinecones, Leaves, Sticks, Wood Scraps and Nuts!

You can't get more natural than that, can you?

These are ornaments that I made quite a few years ago. These first two are made from thistles. You see them growing along side the road all the time. In the summer they are pretty and purple, now they are drab and brown and dried up, but they are still beautiful in their own natural way. But be warned, they are prickly! If you are not sure what to look for, check them out on google images and lots of photos will come up for you to see.

You can pretty much tell how to make the following ornaments by looking at the finished product.

I spray painted the thistles gold. You could choose any color you wish. On this first one get a small piece of lace and hand baste a length of thread through the top of it, pull on the thread and gather it together and sew a few stitches to make it stay. Glue this 'hat' of lace to the top of the thistle, tie a little ribbon bow and glue it on top and then glue on a wire hanger. You can glue the wire hanger on first and put the lace on top of it, if you wish. Voila!


This next one is a little more complicated, but still easy. I saw ornaments like this at Tamarack one time and they were selling for an outrageous price. I said to myself, "I can make these." Cut out a circle from muslin material, baste thread around the edges, put a handful of cotton in the middle, pull the thread together and tack it to make the body. Glue a little piece of lace around the top of it for her collar, make a bow with raffia and glue on the back for her wings. Lay a small thistle on it's side and glue it on top for her head, glue a little string of pearls around the top of her head for a halo and glue tiny black seed beads on her thistle head for eyes and nose. Glue a piece of wire on the back for a hanger.


Next is a pine cone snowman. I love these. If you've gotten your cones outside, condition them by putting them on an aluminum foil covered cookie sheet in a 200 degree oven for around 30 minutes. This will open them up and get the sap out and kill any critters that may be hiding inside. Keep an eye on them while in the oven. Allow them to cool.

I painted mine white and glued on small buttons here and there on the tips. Hot glue a wooden ball on the fat end of it for the head. Paint it white and paint a face on it. Make a hat and scarf out of scrap materials. Make a hanger out of ribbon and glue it onto the back of the snowman.


Angels can be made by spraying the pine cones gold. I glued a hazel nut on for the head. I used artificial leaves cut from an old bunch of flowers and glued them onto the back for wings. An artificial holly bunch would work good for this. You probably could even use real holly leaves and spray them gold. I glued a little piece of string pearls around her neck for a necklace and you can use anything you want to glue around her head for the halo. Glue a ribbon on the back for a hanger. Everything will be spray painted gold, so it doesn't matter a lot what you use for her adornment. I made a lot of these one year. You can tell they are not as shiny as they used to be, because I made them a long time ago.


I made this angel out of a scrap piece of wood! I had the adults in vacation Bible school make these one year out of scrap pieces of old wood from the old church floor that was replaced. They loved them. Leave the bottom of the wood natural and paint a small top section flesh color for her face. Paint a face on her. I had pipe cleaners that looked like a pine branch, I cut them and glued them around her neck, you could also use plain green pipe cleaners. I cut strands of yarn and tied them together around the middle and glued it on top of her head for her hair. Again I used a small piece of string pearls for her halo and I glued a wire on the back of her head and wrapped the other end of it around a wooden star that I painted gold. I cut two pieces of ribbon for her arms and glued them to the side of the wood stick, just under the green pine. I tied them together at the bottom for her hands and glued them and two tiny roses against her body. For her halo I doubled a paper doily in half and glued to the back. You could also make a bow with raffia for her wings.

This next star is very simple. Use sticks or grape vine pieces. Cut them into the size you want and wrap strips of scrap material around them. Glue the ends of the scrap material onto the sticks. Place the sticks into a star shape and hot glue together. If you want, you could omit the material or you could spray paint the sticks gold.


Some of these are a little easier to make than others. Some could be made very easily by the novice crafter. The thistle with lace, pine cone angels and star are very easy to make. I used a hot glue gun when making these projects. You can always add your own special touches and make them a little different than I did. I showed these to inspire you and give you ideas of how you can make ornaments using things found outside around you.

Here is a picture of an artificial holly bunch and the string of pearls I used for the wings and necklaces and halos of the angels.


Here is a tip for painting eyes. Dip the blunt end of the paint brush into the black paint and quickly dot it on for the eye. You may want to dot it on a piece of paper first, in case you have too much paint on it or for making a practice eye. Then get a toothpick and put it in the white paint and use it to make the white dot of the eye.

Have you made these before? Let me know if you give any of them a try.

Happy crafting!

Tuesday, December 8, 2009

Cinnamon Stick Scrabble Ornaments

I decided to make a cinnamon stick Christmas ornament to put in my giveaway box.
I make these every year and people love them. Last year at a craft show I brought the ornaments already made, except I had no letters on them. I personalized them while they waited.

Here are the supplies you need:


buttons, cinnamon sticks, scrabble letters, ribbons and/or bows of your choice,
crafting wire, jingle bells and hot glue gun.


Cut a piece of the wire twice the length of the cinnamon stick, plus a little longer. Fold the wire in half and slide a jingle bell down one of the wires to the bend.


Slide the wire up the holes of the cinnamon stick. Sometimes, this can get a little tricky. You may have to wiggle and push a little to get it to go. Sometimes, they won't go at all and you have to try another cinnamon stick until you get one that works.


Twist the excess wire around and around and shape it into a hanger.


Now, get your bow or ribbon and hot glue it to the top of the cinnamon stick.


If the wire is loose, glue it where it comes out the top of the cinnamon stick, so it will stay in place.


Glue your scrabble letters down the cinnamon stick. I just realized that I didn't have one with my name on it. So, I made one for me. Don't you just love the stringy hot glue that gets everywhere.


I made one that says PEACE and I made one without letters on it. WHY? It will go into my giveaway box tomorrow to be mailed to the winner. I will put your name on it (if I have the letters needed) or another name or a Christmas word. Whatever you want, just so long as I have the letters needed to do it.

Here they are hanging on my undecorated tree.


They are easy to make. I usually pick up cinnamon sticks and old scrabble games at yard sales all summer.

Use your imagination. Use any type or color of ribbon you want. Use rusty bells if you have them. You don't have to put buttons on them, I just so happen to like buttons and I have lots of them. I try to use what I have on hand when I make crafts.

Good words to put on them are: JOY, LOVE, SIS, MOM, DAD, PEACE, CHRIST, SANTA, GRANDMA, GRANDPA, SNOW, SNOWMAN, etc.

Give it a try and make them for gifts or for your family. They would make good name tags on gifts.

Wednesday, November 18, 2009

"First" Christmas Ornament

My son got married in January, so I thought I'd make them a "first Christmas" ornament.

Here are the supplies you will need:

wire (22 guage or thicker), wired ribbon, mod podge, glitter, beads, brush, wire cutter, punch
and of course a used flat canning lid (not pictured) I save my used canning lids and have a ice cream bucket full of them.

I spray painted my lid a gold color and my husband drilled a small hole in the top and bottom of the lid. You can file down the sharp edges or get a hammer and hit a punch on the hole and it will flatten any sharp edges. This is how I did it. Find pictures that you want on the ornament and print them off on your printer on regular paper (not photo or card stock). Use the canning lid as a template and draw a circle around your picture. When you cut it out, cut inside the line around 1/4" or so.


Brush Mod Podge on the lid.


Put on the cut out picture and smooth away any wrinkles.


Pick a pretty font and color and type out "First Christmas 2009" on it. Print it and tear around the words and put it on top of the photo and apply another coat of Mod Podge over the entire surface.


I put a picture of the wedding cake on the back. Wait until the Mod Podge has dried on the pictures and apply another coat around the edge and sprinkle the glitter around the edge on both sides.


Cut two lengths of gold wire. Put one into the hole on top for the hanger. Shape it pretty like. Fold the other length of wire in half and insert it into a wooden heart that you have painted gold,
slide glass beads onto the wire, put the wire into the bottom drilled hole, bend over and twist it around and around.


Tie an approximately 2 foot length of wired ribbon into a bow around the bottom of the hanger. Here is the front of the finished product. It looks much better than the picture shows, the lighting is not good and there's a glare on the picture.


Here is the back view with the wedding cake.


There are lots of possibilities with this ornament. You can make one for a baby's "First Christmas", you could put Victorian pictures on the ornament, pet pictures on the ornament, etc. etc. If you do one for a baby, you could use a combination of small ribbons for the bow, paint the lid either blue or pink and hang pretty little plastic baby items instead of the heart.


I wasn't too good on the instructions, but I think you get the idea. They are pretty easy to make.
Use your imagination and make lots of different ones. You could use silver or copper wire, different kinds of ribbons and beads, homespun ribbon etc., like I said before the possibilities are endless.