Thursday, September 24, 2015

Fall Tomato Cage Tree

I thought I would do a post on a fall decoration I recently made.

Buy a tomato cage - or if you already have these, all the better. Turn it upside down and tie the ends together with twine. It has a tendency to lean, so you might have to straighten it a little.


Wrap it in a garland of fall leaves.

There are different ways to do this. You can swirl it around and around or go straight down the wires. The leaves are swirled in the first three pictures.


 I tried different toppers. Once, I topped it with a straw hat, once I topped it with a pretty fall bow and finally I topped it with a small corn pic.

 Experiment and try different toppers and different ways of wrapping the leaf garland.

On my deck

in my dining room!

My final version has the garland(s) going down and across the wires. I secured them with pieces of thin ribbon. You can use orange, yellow or beige ribbon. It blends right in with the leaves.

I got a basket and placed the pumpkins in it 
and placed it inside the tree. 


If you have a set of small lights, you could string them on the tree.

I love the way it turned out. If you haven't already made one, maybe you could give this easy craft a try.

I love fall!


Sunday, September 20, 2015

Freezing Corn - the Easy Way


I love corn put up in the freezer. It is so much better than canned corn from the store - much better.

I used to do it the hard way. I would blanch the ears of corn, then put them in ice water in the kitchen sink to cool. This was very time consuming, messy, and used a lot of ice.

This is how I do it now. And, if you don't want to make a sticky mess in your kitchen, do it outside.

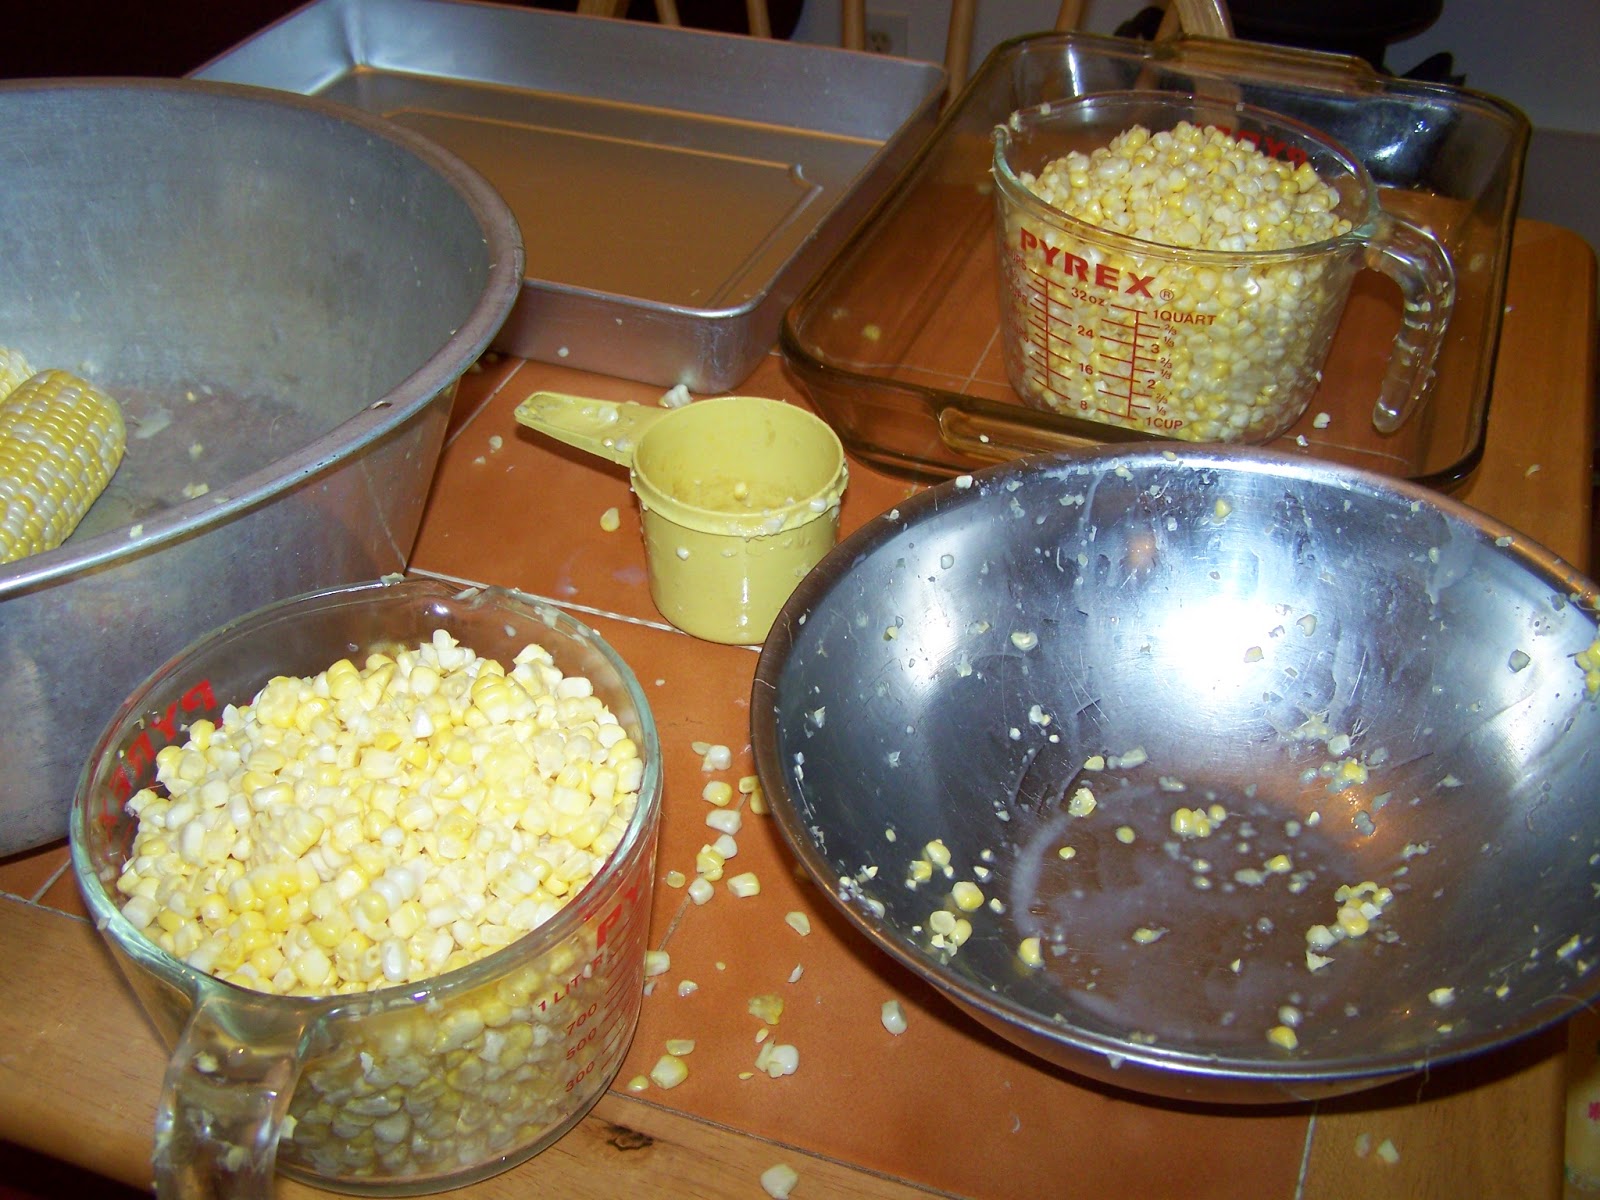
First, you get a bunch of corn . . .

Shuck the corn and cut it off the cob . . .


Get a couple of big pots and put a stick of butter, 1 cup of water and 4 T. of sugar in each one . . .


Add 10 cups of cut off corn to each pot with the butter, water and sugar mixture . . .


Bring to a boil and boil for 3 minutes

Pour the corn into containers to cool . . .


Then fill your freezer bags!

                                I put three cups in each bag

I don't know what I would do without my freezers.

If you are really feeling energetic, take the corn cobs and make corn cob jelly. Click here to see how I did that last year.

Have you put up any food this summer?


Monday, September 14, 2015

Family Reunion

Saturday we had our annual McMillion Family Reunion.

Close to forty family members came out in the cool and slightly rainy weather.

We had a great time! In addition to our auction, which raises money for the reunion, and playing Bingo, we had lots and lots of good food, fellowship and fun photo opportunities in our little 'photo booth'.


We brought props, such as an old pitch fork, eggs and egg basket, hay bales, hats, aprons, pumpkin, bench, etc., to make each picture fun and unique.


My cousin and her son painted the above picture on plywood. They went by this old photo of our grandparents, taken in the early 1900s. I think they did a great job. We all had a fun time posing as Grandma and Grandpa. 


I remember when I was young we would all meet down at Grandma's house on her birthday for a get together and picnic in her yard.  I guess that was what you would call our early reunions.


Do you have family reunions? What fun activities (besides eating) do you do?


Thursday, September 3, 2015

Canning Potatoes


We've been canning this summer. First green beans, then grape and apple jelly and now potatoes!

This is our first attempt at canning potatoes.

It takes around twenty pounds of potatoes to fill seven quart jars (which is a canner full).

We filled a five gallon bucket with potatoes, washed them . . . 


and cut them into pieces.


They were put in water with Fruit-Fresh (ascorbic acid) in it to keep them from turning brown. When you finish cutting them, drain off the water you soaked them in and add boiling water over them and bring them to a boil and cook for two minutes. Drain them again and put the potatoes into quart jars. Then add fresh boiling water over the potatoes in the jars along with a teaspoon of salt.


Attach sterilized lids, twist on rings and put into your canner.
Do not twist the rings on too tight or the lids might warp during the canning process. (We learned this the hard way. The wide mouth lids have more of a tendency to do this)


After the canning process is finished (the potatoes have to process for forty minutes), have a strong person twist the lid off the canner. (I think we need a new gasket. The lid is very hard to get off)


 Voila! Your potatoes are finished.


Take out of the canner and listen for the ping!  Aren't they pretty?


It is very time consuming, but worth it if you have a lot of potatoes in your garden! I just hate it when in the winter our stored potatoes start growing eyes and get all soft and wrinkly.

You can open a jar up during the winter and put the potatoes in soup, mash them, fry them or warm them up and eat them the way they are.

We have did two batches so far. The second batch went a lot smoother than the first one. A little practice and experience goes a long way.

We have two more rows of potatoes to dig. I think we will take a little break and then can a few more.

Have you ever canned potatoes? Just follow the instructions in your canning booklet and preserve the bounty of your garden.


Monday, August 17, 2015

Busy Summer

We have been very busy here at the Blackberry Patch this summer.

I have even learned how to drive a tractor. I have been taking pics of everyone else riding and working on the tractor, but no one has taken a pic of me driving one. But, I have been -  I promise.

I have decided that I love tractors as much as I dislike barb wire fences - and that is a lot! They are such a time saver when you have a lot of work to do. We just have a small one, but it is a worker! We bought it thinking we would only be cutting grass with it. It now has a bucket on the front and a blade on the back.

A piece of land my son purchased had a drainage problem. He loves a challenge. A friend helped him do the initial work of digging the ditches and making the trenches above them. The entire family has pitched in for a week helping with the finishing touches.

Wouldn't you hate to do all this work - times two - by hand. 

The night after we did the first sowing of seeds, we had a deluge of rain from the sky. Needless to say, the straw didn't stay in place. So we had to do some re-seeding of grass.

We now know about straw blankets. Wish we knew about them sooner. They are wonderful and so easy to work with! We bought the 8 foot x 100 foot rolls. We placed them down the middle in front of the pipes we put in the ditches.


And, we now know to sow oats along with your grass seed. It comes up a lot quicker and you see some green while waiting for the grass to sprout.

We had two huge dirt piles down at the bottom of the hill. That dirt is now spread out at the top of the lot where we needed to fill in some. We have a small tractor, so that meant a lot of trips up and down the hill. But, my son did it. Then he prepared the soil and we spread seeds on it.


Everything is now seeded. 
We are finished! 


Now all we have to do is sit and watch the grass grow.


But, guess what my son said last night.
"Now that this is finished, I need another project."

One thing for sure. My boys aren't lazy.

Thursday, July 9, 2015

Appalachian Food


There is going to be a Potluck & Appalachian Food Program at our library tonight.

You bring your appetite and a dish to share. You can also share an old family recipe and/or family cooking tradition.

I thought and thought about what to bring. I was told I was thinking too much about what to bring.

So, after contemplating on whether to bring an old fashioned stack cake or a blackberry cobbler or  cornbread and corn cob jelly or a hickory nut pie ------I came up with another idea ------ a delicious idea!

Fried apples and biscuits.
 

Go here for a post I did about them a few years ago.

This was one of my mom's favorite dishes. When her sister knew she was coming up for Sunday dinner, Aunt Irma made sure she had fried apples on the table. I have many memories of Mom sitting at our kitchen table with a paring knife in her hand peeling and slicing the apples into a bowl. The kids would come up to her and she'd hand them a slice to eat.

What comes to your mind, when you think of Appalachian cooking/food?

I remember . . .

Pinto beans, fried potatoes and cornbread (this was a meal we had on a regular basis. Enough beans were cooked to last several days)

Applesauce stack cake (my grandmother seemed to always have one sitting on her kitchen table)

Buttermilk biscuits
Blackberry cobblers (Grandma had berry vines on her land and every summer we trekked up the hill to pick them)

Squirrel and gravy (A favorite during squirrel season)

Fried bread
Home made apple butter (I love a spoonful with my pinto beans or to put on top a sausage patty)

Black walnuts, hickory nuts (These nuts are great in fudge, brownies, pies and cakes)

Paw Paws (The West Virginia banana. You either love them or hate them)

I have a lot of recipes listed on my side bar. If you have the time, click on them and take a look ---- and maybe try one or two of them.

I have put together two family cookbooks and took them to our family reunions.

I am also in the process of putting together another cookbook titled, Cooking in the Blackberry Patch. I am filling it with pics, stories, poems and . . . recipes.

I will let you know when I get it published. I think you will like it.

 What food did you grow up with - no matter which area of America you lived.

Do you have any recipes or favorite food history story you would like to share? I would love to hear them.


Sunday, May 17, 2015

Springtime Beauty


I love springtime and the beauty it brings upon the earth.


Our garden has been planted. Our apple and pear trees are full of little apples and pears. Our blueberries and grapes are full of little green fruits. And our flowers are bestowing upon us their colorful and aromatic gifts.


If I Were a Season
 Janet F. Smart

If I were a season, I would pick spring
when new life sprouts beneath my feet
and sunshine warms my soul.

She calls my name to run outside
and explore Mother Earth’s arena
and sniff her sweet perfumes.

“Come to me,” she chants. “Toss
your shoes aside and let your
bare feet frolic upon my green carpet!”

I lift my head and listen to the birds chirp
as they build twig nests
beneath the rainbows in the sapphire sky.

Yes, if I were a season, I would pick spring.
She renews my weary spirit and
cleans the cobwebs from my mind.


Would you pick spring?


Thursday, March 26, 2015

America's Smallest Community Museum


It may be tiny, but Ripley has a museum! Ripley where, you say?

Ripley, WV! We are only a few miles away from other Ripley's in the world.

I love museums. I have often thought of how great it would be to work at a museum - or to even have one of my very own. So, when I found out we had one right here in our little town - no matter how small it was, I just had to have a look see.

Our town was named after Harry Ripley, a circuit riding minister who tragically died in 1830. Legend has it that he fell in love with a local girl, believed to be the daughter of Capt. William Parsons. He drowned days before the wedding while attempting to cross Mill Creek. Their wedding certificate was found in his coat pocket.


The picture above is of West Virginia's last public hanging. It occurred in Ripley, Thursday, December 16, 1897.  


There was a CCC Camp located in Ripley. 
I never knew that!


It does live up to its claim - it is small. At 7-feet, 7-inches wide and 15-feet, 7-inches long, the new museum at the Ripley Convention & Visitors Bureau measures approximately 120-square feet. But, no matter how small, I love  museums. If you are ever in our neck of the woods, check it out. It is located at the corner of North and Church Streets.

Want to read about another small museum in West Virginia. Go here to another post and read about Shoney's Big Boy.


Monday, February 23, 2015

Feeding our Feathered Friends

I write a kid's column for Two-Lane' Livin' Magazine.
For the January issue, I wrote about feeding our feathered friends.
With the weather and cold the way it is, I thought this would be a good time to post it.


FEEDING OUR FEATHERED FRIENDS
     Why did the little bird get in trouble at school?  He got caught peeping on a test.
     Have you ever heard of the expression, “Eating like a bird?”
     How exactly does a bird eat?
     First, birds do not have teeth. I bet you already knew that. They have a high metabolism and low levels of body fat, so they do not have much stored energy and cannot go more than a couple of days without food. They eat until bedtime and start feasting as soon as they wake up, eating hundreds of tiny seeds throughout the day. We have bird feeders, and I notice that certain times of the day we are more likely to see birds eating than at other times.
     What’s for supper?
     The shape of their bill gives you a clue as to what they eat. Birds that eat seeds tend to have a thick cone-shaped bill that is good for cracking seeds. Cardinals, finches and sparrows are birds that eat seeds all year long. The seed that attracts the widest variety of birds is sunflower.  The black oil sunflower seeds have thin shells and are easy to crack open. They have high fat content and are very good for birds. Woodpeckers, nuthatches and black-capped chickadees love suet. And from experience, I know blue jays and titmice love peanuts.  Seed-eating birds need grit to help digest their food. Eggshells are an excellent source of grit and calcium. Crush cleaned eggshells from hard boiled eggs. If eggs are not boiled, bake the washed shells in a 250 degree oven for 10 minutes until dry, but not brown. Crush into small pieces and place outside.
     Keep an eagle eye on your feeders!
     See if you can identify the types of birds that come to eat. Birds come in all shapes, sizes and colors. A bird guide can help you identify them.
     Make it!
     If you do not have a bird feeder, building one would be a good project when the wind is howling and it is too cold for playing outside in the snow. To make an easy feeder, with adult supervision, cut holes (2-4 inches wide) out of the sides of a clean, empty milk jug. Make a small hole beneath each opening to insert dowel rods for perches. Punch drain holes in the bottom and fill the jug with seeds and hang in a nearby tree.
     Watch out for backyard bandits!
     Cats love to ambush birds while they feed.  And, although peanuts are very popular with blue jays and titmice, other animals also like them. Keep your feeders near the shelter of bushes and trees, but not so close that their enemies can jump out and ambush them.  Remember to keep your feeders clean and also provide water for birds in the winter.
     Winter can be a hard time for birds.  Days are short and nights are cold and long. Providing them with food is not only a fun activity, but helps provide birds the energy to keep warm.

******************************************************

We had a surprise this morning. We have seen or heard of squirrels and deer eating at or around bird feeders . . . But, a rabbit?


 I love our woodpeckers


 Here is my milk jug feeder
most all the birds visit it

I have seen juncos, titmice, cardinals, blue jays, finches, woodpeckers, doves, blackbirds, towhees, starlings, etc. at my feeders.

Are you feeding the birds? What birds are your favorite to watch?

Wednesday, December 24, 2014

Merry Christmas - The Christmas Star


THE CHRISTMAS STAR
          by Janet F. Smart          

The wise men from the east

All traveled from afar,

To find the little babe

Beneath the Christmas star.


I wish I were that star

That went before the kings,

The star of Bethlehem

Of which the angels sing.


I wish I were that star,

The star that showed the way,

And led the kings to find

Our Savior where he lay.


I wish I were that star,

That told of Jesus’ birth.

             The star of awe and hope              

That glowed above the earth!


Merry Christmas everyone!