Wednesday, December 30, 2009

Once In A Blue Moon


Have you ever heard of the expression 'once in a blue moon?'

You probably have. Tomorrow night on New Year's Eve there will be a 'blue moon.'

According to popular definition, a blue moon is the second full moon in a month. A full moon also occurred on Dec 2. But don't expect it to be blue - the name has nothing to do with the moon's color.

New Year's Eve blue moons are rare, occurring every 19 years. The last time was in 1990, the next one won't come again until 2028.

Historically, each full moon throughout the year was given a folk name to help people remember to prepare for the upcoming season. The 'harvest moon' is the full moon that occurred closest to the autumn equinox. It occurred at the peak of harvest and the light of the full moon allowed farmers to work late into the night.

Some folktales say when there is a full blue moon, the moon had a face and talked to those in it's light.

So, even if you can't stay up to watch the new year come in tomorrow night, go out and look up at the blue moon. It will be a while before you see one again. All full moons are beautiful, may it inspire us to do good in the following new year.

Grab your telescopes and hope for a cloudless sky.

Saturday, December 26, 2009

Tis The Day After Christmas

I'm so tired! There was no getting up early and shopping the after Christmas specials. I've got enough Christmas stuff and don't need any more. I may get a little wrapping and tissue paper, but that's all.

Tis the day after Christmas
And all through the house
Not a creature is stirring
Not even my spouse.

The papers are strewn
All around the floor
The boxes are stacked
Up against the door.

The house is a mess
Don't know where to start
To haul off this stuff
We'll need a big cart.

I think I'll sit down
And rest my tired feet
It'll be a while
'till my home is neat.


I hope everyone had a very nice Christmas!

Our snow is gone with only a few patches of white here and there. The sun is shining and I don't even want to think of cleaning my house. I fixed a big breakfast of sausage gravy and biscuits and tomato gravy, too, and I have a sink full of dishes. I hope I don't have any company until next year :) That's not too much to ask, is it? Maybe by then, it'll be back to normal.

All kidding aside, we had a very nice Christmas. My son and his wife, my sister and brother in law and my dad came out on Christmas Eve. We had a nice dinner and a good visit with each other. Charley worked day shift this week and had to work on Christmas Eve and Christmas Day, so we opened our presents on Christmas Eve night. He works 12 hour shifts and went to bed around midnight and got up at 3am to go out to work on Christmas Day. So we are tired and not doing much of anything today.

Do any of you have your house cleaned up yet?

Wednesday, December 23, 2009

Bright Cherry Jam!

I haven't been very cheery lately, so I thought I would make some cherry jam. I had been putting it off for a long time. I have never made cherry jam before, but I'm not that good at making the pies, so I thought I would use some of the bright red fruit I have in the freezer and make jam with them.

Here is the recipe I used:

4 cups prepared fruit (take all those pits out)
1/4 cup lemon juice
1 box SURE JELL fruit pectin
5 cups sugar
1/4 tsp almond extract

Prepare your jelly jars. Either sterilize the jars before hand or process your jam for 10 minutes afterwards. There will be instructions on the Sure Jell pkg insert about how to prepare and handle the jars and lids.

Finely chop or grind fruit. Measure exactly 4 cups of the prepared cherries into a large sauce pot. Stir in lemon juice.

Stir the pectin into the fruit mixture in the sauce pot. Bring mixture to full rolling boil on high heat, stirring constantly. Stir in sugar and extract. Return to full rolling boil and boil exactly 1 minute, stirring constantly. Remove from heat; skim off any foam with a metal spoon.

Ladle immediately into prepared jars, filling to within 1/8 inch of tops. Wipe jar rims and threads with a damp paper towel. Cover with two-piece lids and screw bands tightly.

Now you can either process them in boiling water for 10 minutes or invert the jars for five minutes. Then, listen for the ping, letting you know your jars have sealed.

As I stated above, you can follow the instructions in the Sure Jell pkg insert. My ingredients are a little different, though. They don't tell you to add the lemon juice or almond extract and the amount of sugar they tell you to use is only 4 & 3/4 cups.

Here is where I got my recipe that I used
.

My son, David, who I didn't think was that crazy about cherries, loved it!
I had a little extra left over and it is delicious on crackers. It tastes just like a cherry pie.


One of my jars did not seal, so it will be put in the fridge and be our first jar to eat.


Making jelly is easy to do and I have been doing it for years. Just get all your ingredients and utensils ready before your start and the process doesn't take very long at all.

Add some cheer to your jelly jars by making bright red cherry jam!

Monday, December 21, 2009

Hard Rock Candy

I like hard rock candy. It's fun to make this time of year. It makes good little gifts to give. It is something nice to sit on your desk at work to share with your co workers. When giving it as a gift, put it in small jelly jars.


I will share with you a quick way of making it.

Gather confectionery sugar, flavorings, food colorings and sugar. There are many flavors to choose from, cinnamon seems to be the favorite at our household, we also like root beer, but I couldn't find any at the store. I made cinnamon and orange this time.


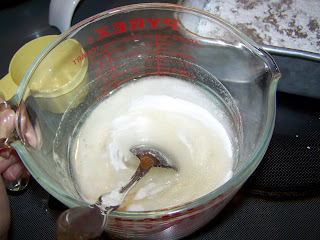
Stir together: 1 cup sugar and 1/2 cup light corn syrup in a large microwaveable glass bowl. Cover it with plastic wrap and put it in the microwave for 3 minutes.


Remove from microwave, take off the plastic wrap and stir again.


Put a new piece of plastic wrap over the bowl and microwave for another 3 minutes. Watch it the last 30 seconds or so, depending on your microwave, it may get too hot and burn the sugar. I took mine out with about 10 seconds to spare. Be careful taking off the plastic. . . the hot steam will get you if you don't watch out!


Add the food coloring and flavoring and stir. My recipe says to add 1/2 tsp of flavoring, but if you want a more intense flavor, just add the entire 1 fl dram bottle. Be careful with the cinnamon, the scent is pretty intense when you put it in.

Pour it out onto a cookie sheet or other container. The package of the flavorings says to put it on a greased cookie sheet. I probably do not need to tell you this but, DO NOT PUT IT ON ANYTHING TEFLON COATED. Quickly, spread it out a little and after waiting a few minutes, score it with a knife. It cools around the sides quicker than in the middle. You will have to keep going over the score marks while it cools. Let the candy cool and break it into pieces.


Here is my cinnamon batch.


Break it into pieces and coat it with the confectionery sugar.


This is not something to let children do. They may get burned. They can help you break it into pieces. If you have any, you could pour the mixture into lightly oiled lollipop molds for the little ones.

Is this something you make during the holidays?

Saturday, December 19, 2009

Warm Winter Wishes!

I wanted to wish all my snowbound friends warm winter wishes. . .


before I show you some pretty snow pictures.

one of our maple trees


our apple trees


bird house


grape vines and blackberry bushes . . . brrrr


Catawba trees


our poor little doe


down by the creek


down by a neighbor's barn


our holly tree


our lovely sycamore tree

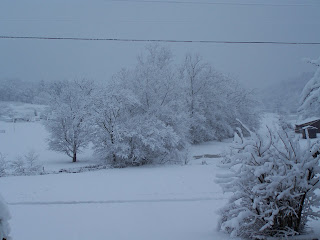
It's still snowing.

Here's hoping the electric doesn't go out from the weight on the lines.

Wednesday, December 16, 2009

My Christmas Angel

Every Christmas season I wear my Christmas Angel pin.


I'll show you how to make them. You will need wooden wings and wooden rounds for the heads. A sparkly pipe cleaner for the halo, white paint, flesh colored paint, a pen that writes gold, pin backs, skinny ribbon, Q tip, rouge, mod podge and glue.

Paint the wings with two coats of white paint. Paint the heads flesh color. Let dry.


Draw the face on with the gold writing pen. Use a Q tip to dot rouge on her cheeks.


Make halos with the pipe cleaner and use the gold pen to decorate the wings with dashes and stars.


Glue the head onto the wings and glue the halo onto the head. Put a coat of mod podge on the angel. When it dries, this will give it a pretty sheen.


Tie the skinny ribbon into a bow and glue to the bottom of her face and glue the pin back onto the back of the wings.


If you wish to give them as a gift to someone, print off angel clip art on card stock and cut into rectangles. Punch holes into it for the pin back to go into.


Everyone needs a Christmas Angel to help them through each day.

Sunday, December 13, 2009

Oh Christmas Tree

I put my trees up this past week!

A little one in front of the window in the living room is decorated with candy canes, lollipops, cinnamon cut out ornaments and gum drop ornaments. I posted here last year on how to make the gum drop ornaments. And I posted here on how I made the cinnamon dough ornaments.


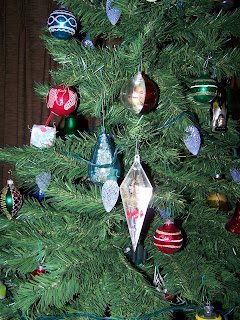
And our large one is in front of the sliding glass doors in the family room. First I put all vintage glass ornaments on it and then I just had to add some of my hand made ones.


A happy note. . . two of my sons had birthdays over the weekend.

A sad note. . . my father in law passed away Saturday. He was a wonderful man and will be missed. But he is out of pain now and has gone to a better place. Remember his family in your prayers.

Saturday, December 12, 2009

Making 'Natural' Ornaments

Thistles, Pinecones, Leaves, Sticks, Wood Scraps and Nuts!

You can't get more natural than that, can you?

These are ornaments that I made quite a few years ago. These first two are made from thistles. You see them growing along side the road all the time. In the summer they are pretty and purple, now they are drab and brown and dried up, but they are still beautiful in their own natural way. But be warned, they are prickly! If you are not sure what to look for, check them out on google images and lots of photos will come up for you to see.

You can pretty much tell how to make the following ornaments by looking at the finished product.

I spray painted the thistles gold. You could choose any color you wish. On this first one get a small piece of lace and hand baste a length of thread through the top of it, pull on the thread and gather it together and sew a few stitches to make it stay. Glue this 'hat' of lace to the top of the thistle, tie a little ribbon bow and glue it on top and then glue on a wire hanger. You can glue the wire hanger on first and put the lace on top of it, if you wish. Voila!


This next one is a little more complicated, but still easy. I saw ornaments like this at Tamarack one time and they were selling for an outrageous price. I said to myself, "I can make these." Cut out a circle from muslin material, baste thread around the edges, put a handful of cotton in the middle, pull the thread together and tack it to make the body. Glue a little piece of lace around the top of it for her collar, make a bow with raffia and glue on the back for her wings. Lay a small thistle on it's side and glue it on top for her head, glue a little string of pearls around the top of her head for a halo and glue tiny black seed beads on her thistle head for eyes and nose. Glue a piece of wire on the back for a hanger.


Next is a pine cone snowman. I love these. If you've gotten your cones outside, condition them by putting them on an aluminum foil covered cookie sheet in a 200 degree oven for around 30 minutes. This will open them up and get the sap out and kill any critters that may be hiding inside. Keep an eye on them while in the oven. Allow them to cool.

I painted mine white and glued on small buttons here and there on the tips. Hot glue a wooden ball on the fat end of it for the head. Paint it white and paint a face on it. Make a hat and scarf out of scrap materials. Make a hanger out of ribbon and glue it onto the back of the snowman.


Angels can be made by spraying the pine cones gold. I glued a hazel nut on for the head. I used artificial leaves cut from an old bunch of flowers and glued them onto the back for wings. An artificial holly bunch would work good for this. You probably could even use real holly leaves and spray them gold. I glued a little piece of string pearls around her neck for a necklace and you can use anything you want to glue around her head for the halo. Glue a ribbon on the back for a hanger. Everything will be spray painted gold, so it doesn't matter a lot what you use for her adornment. I made a lot of these one year. You can tell they are not as shiny as they used to be, because I made them a long time ago.


I made this angel out of a scrap piece of wood! I had the adults in vacation Bible school make these one year out of scrap pieces of old wood from the old church floor that was replaced. They loved them. Leave the bottom of the wood natural and paint a small top section flesh color for her face. Paint a face on her. I had pipe cleaners that looked like a pine branch, I cut them and glued them around her neck, you could also use plain green pipe cleaners. I cut strands of yarn and tied them together around the middle and glued it on top of her head for her hair. Again I used a small piece of string pearls for her halo and I glued a wire on the back of her head and wrapped the other end of it around a wooden star that I painted gold. I cut two pieces of ribbon for her arms and glued them to the side of the wood stick, just under the green pine. I tied them together at the bottom for her hands and glued them and two tiny roses against her body. For her halo I doubled a paper doily in half and glued to the back. You could also make a bow with raffia for her wings.

This next star is very simple. Use sticks or grape vine pieces. Cut them into the size you want and wrap strips of scrap material around them. Glue the ends of the scrap material onto the sticks. Place the sticks into a star shape and hot glue together. If you want, you could omit the material or you could spray paint the sticks gold.


Some of these are a little easier to make than others. Some could be made very easily by the novice crafter. The thistle with lace, pine cone angels and star are very easy to make. I used a hot glue gun when making these projects. You can always add your own special touches and make them a little different than I did. I showed these to inspire you and give you ideas of how you can make ornaments using things found outside around you.

Here is a picture of an artificial holly bunch and the string of pearls I used for the wings and necklaces and halos of the angels.


Here is a tip for painting eyes. Dip the blunt end of the paint brush into the black paint and quickly dot it on for the eye. You may want to dot it on a piece of paper first, in case you have too much paint on it or for making a practice eye. Then get a toothpick and put it in the white paint and use it to make the white dot of the eye.

Have you made these before? Let me know if you give any of them a try.

Happy crafting!

Thursday, December 10, 2009

Vintage Thingies Thursday - Vintage Christmas

I'm participating in Vintage Thingies Thursday again, hosted by Colorado Lady. Go visit and see who else is posting their vintage thingies.

I thought I'd show you some of my vintage Christmas decorations that I finally got put out.

I will probably add more decorations later, but so far my tree has all vintage ornaments on it, I'm even thinking about adding icicles. . . remember those! When I was a child, I loved my Aunt Gracie's Christmas tree. She had each icicle placed perfectly. It was beautiful!


Here is my wreath I made a few years ago. I just tied old ornaments on a pine wreath, it was very easy to make.


And I love my vintage Christmas aprons!


Here is my coffee table with my mom's old Santa hat surrounded by a few vintage Christmas pieces. I wrote a short story about my mom's hat and it was published this year in the book Christmas Traditions. The little Santa candle is only around 21 years old, but I'm attached to the battered up candle , because my youngest son used to carry it around everywhere when he was little. Notice how beat up it is.


And here is my Santa cookie jar surrounded by my old set of Christmas glasses.


Hope you enjoyed seeing some of my vintage Christmas items. The cookie jar has cookies in it, but they aren't vintage, they don't last that long around our house :)

Wednesday, December 9, 2009

Winner!

Thanks to all of you who entered my giveaway!

Wish I could send something to all of you. If it wasn't for the cost of the postage, I would.

Drum roll . . . please. The winner is PenPen!

Email me with your address and word you want on your scrabble ornament.

Thanks again.

Tuesday, December 8, 2009

Cinnamon Stick Scrabble Ornaments

I decided to make a cinnamon stick Christmas ornament to put in my giveaway box.
I make these every year and people love them. Last year at a craft show I brought the ornaments already made, except I had no letters on them. I personalized them while they waited.

Here are the supplies you need:


buttons, cinnamon sticks, scrabble letters, ribbons and/or bows of your choice,
crafting wire, jingle bells and hot glue gun.


Cut a piece of the wire twice the length of the cinnamon stick, plus a little longer. Fold the wire in half and slide a jingle bell down one of the wires to the bend.


Slide the wire up the holes of the cinnamon stick. Sometimes, this can get a little tricky. You may have to wiggle and push a little to get it to go. Sometimes, they won't go at all and you have to try another cinnamon stick until you get one that works.


Twist the excess wire around and around and shape it into a hanger.


Now, get your bow or ribbon and hot glue it to the top of the cinnamon stick.


If the wire is loose, glue it where it comes out the top of the cinnamon stick, so it will stay in place.


Glue your scrabble letters down the cinnamon stick. I just realized that I didn't have one with my name on it. So, I made one for me. Don't you just love the stringy hot glue that gets everywhere.


I made one that says PEACE and I made one without letters on it. WHY? It will go into my giveaway box tomorrow to be mailed to the winner. I will put your name on it (if I have the letters needed) or another name or a Christmas word. Whatever you want, just so long as I have the letters needed to do it.

Here they are hanging on my undecorated tree.


They are easy to make. I usually pick up cinnamon sticks and old scrabble games at yard sales all summer.

Use your imagination. Use any type or color of ribbon you want. Use rusty bells if you have them. You don't have to put buttons on them, I just so happen to like buttons and I have lots of them. I try to use what I have on hand when I make crafts.

Good words to put on them are: JOY, LOVE, SIS, MOM, DAD, PEACE, CHRIST, SANTA, GRANDMA, GRANDPA, SNOW, SNOWMAN, etc.

Give it a try and make them for gifts or for your family. They would make good name tags on gifts.